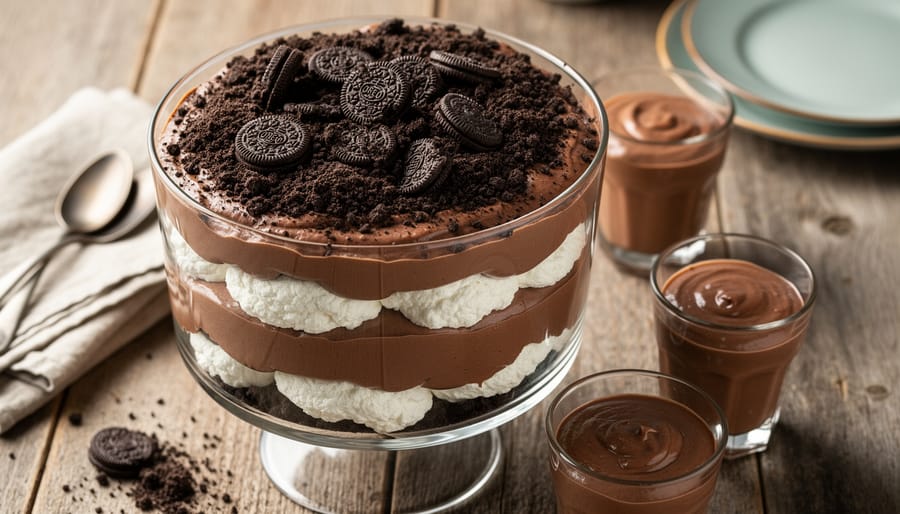
Dirt cake with chocolate pudding is a no-bake dessert that layers crushed chocolate sandwich cookies with creamy chocolate pudding and whipped topping to create an edible “dirt” masterpiece that looks deceptively rustic but tastes divine. You can assemble this crowd-pleasing treat in just 20 minutes with zero baking required, making it perfect for potlucks, kids’ parties, or any occasion when you want maximum impact with minimal effort. The recipe relies on simple pantry staples and refrigerator time to work its magic.
What makes this dessert so appealing goes beyond the fun presentation. The contrast between crunchy cookie crumbs and silky pudding creates textural harmony in every spoonful, while the familiar chocolate flavor profile means even picky eaters will come back for seconds. If you’re already a fan of easy chocolate desserts, you might also enjoy a box mix chocolate pudding cake for similar convenience with a baked twist.
Health-conscious home cooks appreciate that dirt cake offers room for thoughtful ingredient swaps without sacrificing the nostalgic appeal. You can lighten the recipe with reduced-fat pudding and whipped topping, or boost nutritional value by incorporating Greek yogurt into the layers. The beauty lies in its flexibility: serve it in individual cups for portion control, layer it in a clear trifle dish for visual drama, or present it in a clean flower pot complete with gummy worms for playful charm.
What You’ll Need: Tools and Ingredients
Kitchen Tools and Equipment
You’ll need a few basic kitchen tools to make dirt cake efficiently. Start with two medium mixing bowls for preparing separate mixtures. An electric hand mixer or stand mixer makes quick work of beating the cream cheese layer to a fluffy consistency, though you can use a sturdy whisk if needed.
Have standard measuring cups and spoons ready for portioning ingredients accurately. A rubber spatula helps fold mixtures together gently without deflating the airy texture.
For crushing Oreos, use either a food processor for speed or place cookies in a sealed plastic bag and crush with a rolling pin or meat mallet. The bag method costs nothing extra and works perfectly.
Choose your serving vessel based on presentation preference. A clean terracotta flower pot creates the classic garden look, while a clear trifle dish showcases pretty layers. A 9×13 inch baking pan works well for crowd-sized portions and easy scooping.
Ingredient Checklist
Here’s your complete ingredient list for making dirt cake with chocolate pudding to serve 12-15 people:
For the pudding mixture:
– 2 (3.9 oz) packages instant chocolate pudding mix
– 3 cups cold whole milk
– 8 oz cream cheese, softened to room temperature
– ½ cup (1 stick) unsalted butter, softened
– 1 cup powdered sugar
– 12 oz Cool Whip (or generic whipped topping), thawed
For the ‘dirt’ layer:
– 1 (14.3 oz) package Oreo cookies (about 36 cookies)
When shopping, choose instant pudding rather than cook-and-serve varieties for this easy chocolate pudding dessert. Store brands work perfectly well and can cut your cost by 30-40% without sacrificing taste. For the cream cheese, full-fat versions blend more smoothly, though reduced-fat options are acceptable if you’re watching calories. Make sure your butter and cream cheese sit at room temperature for at least 30 minutes before mixing to prevent lumps. Generic sandwich cookies crush just as well as name-brand Oreos while saving you a few dollars per package.
Preparation and Safety Tips
Before you start mixing ingredients, taking a few safety precautions ensures your dirt cake turns out delicious and safe to enjoy. This dessert relies on dairy products that require careful handling from start to finish.
Always begin with clean hands and sanitized mixing bowls, utensils, and countertops. Wash your hands with soap and warm water for at least 20 seconds before handling any ingredients, particularly when working with cream cheese and other dairy products that can harbor bacteria if contaminated.
Check expiration dates on all dairy ingredients including milk, cream cheese, and Cool Whip before you begin. Using expired dairy products can lead to foodborne illness, and they won’t whip or blend properly either. If your cream cheese feels unusually firm, let it sit at room temperature for about 15 minutes to soften, but never leave it out for more than 30 minutes.
Temperature control matters significantly with this no-bake dessert. The combination of cream cheese, pudding, and whipped topping creates an environment where bacteria can multiply quickly at room temperature. Never leave your assembled dirt cake out for more than two hours, and if you’re serving it at an outdoor event during warm weather, limit exposure to one hour.
Store leftover dirt cake covered tightly with plastic wrap or in an airtight container in the refrigerator. It will stay fresh for three to four days when properly stored. If you notice any off smells, separation, or discoloration, discard the dessert rather than risk consumption.
For guests with dietary restrictions, consider labeling your dessert clearly or preparing a separate version using gluten-free cookies and dairy-free alternatives to accommodate common sensitivities.
Step-by-Step Dirt Cake Instructions
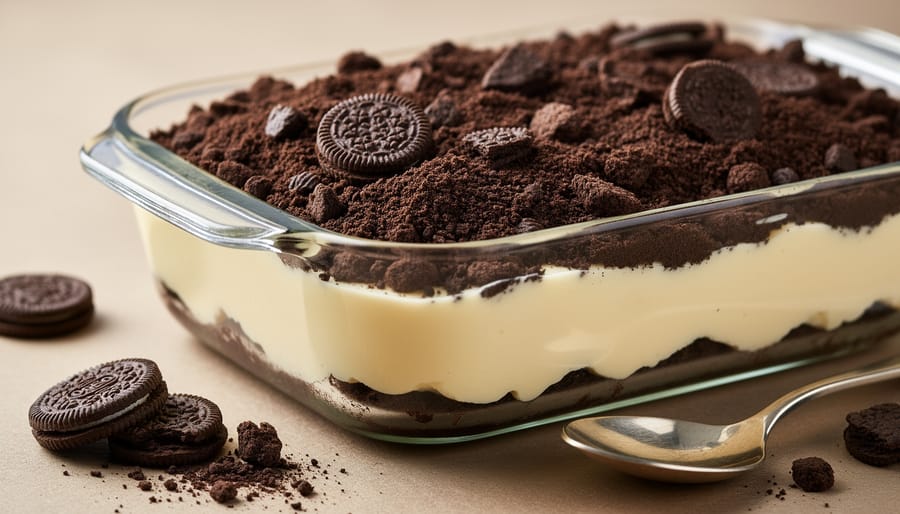
Step 1: Prepare the Chocolate Pudding Base
Pour two cups of cold whole milk into a medium mixing bowl. Add one package (3.9 ounces) of instant chocolate pudding mix directly to the milk. Using a whisk or electric mixer on low speed, blend the mixture for about two minutes until it’s completely smooth with no lumps remaining. The pudding will start thin but thickens quickly as you mix. Stop when you achieve a consistency similar to loose frosting, thick enough to coat the back of a spoon but still pourable. If you’re new to how to use pudding mix watch for the mixture to pull away slightly from the sides of the bowl when ready. Transfer the pudding to the refrigerator and let it set for five minutes. This brief chill firms up the base just enough to blend smoothly with the cream cheese layer without making it too stiff to fold.
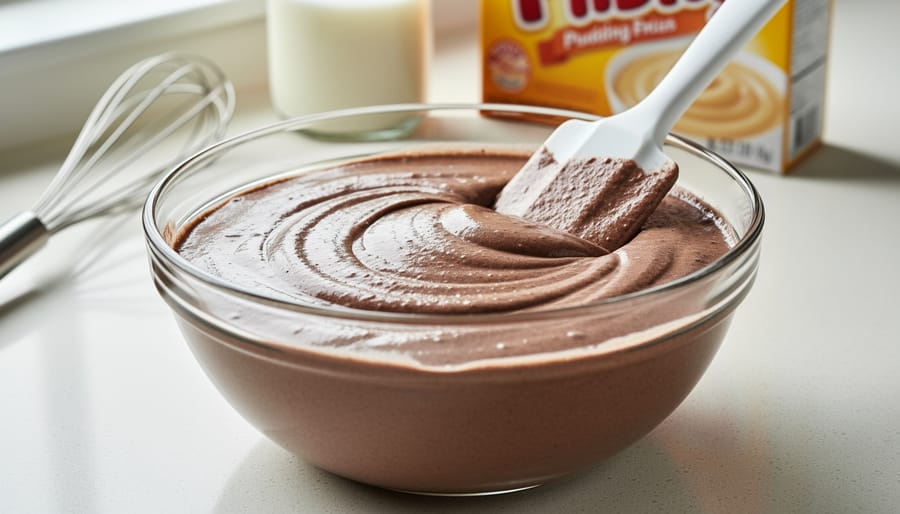
Step 2: Make the Cream Cheese Layer
Start by letting your cream cheese and butter sit at room temperature for about 15 minutes. This simple step makes a huge difference in achieving that perfectly smooth, lump-free texture you’re after.
In a large mixing bowl, combine 8 ounces of softened cream cheese with 1/4 cup of butter. Using an electric mixer on medium speed, beat them together for about 2 minutes until the mixture looks creamy and well blended. Gradually add 1 cup of powdered sugar while continuing to mix. Increase the speed to medium-high and beat for another 2-3 minutes until the mixture becomes noticeably fluffy and light.
Now comes the gentle part. Add 8 ounces of Cool Whip to your bowl. Using a rubber spatula or wooden spoon, fold it in with a gentle lifting and turning motion rather than stirring vigorously. This folding technique keeps air in the mixture, creating that signature light, mousse-like texture that makes dirt cake so irresistible. You’ll know it’s ready when the Cool Whip is fully incorporated and no white streaks remain.
Step 3: Combine Pudding and Cream Mixture
Once your pudding has chilled and your cream cheese mixture is light and fluffy, it’s time to bring them together. The key word here is “gently”, you want to fold, not stir vigorously, to keep all that airiness you’ve worked to create.
Add about one-third of the pudding mixture to your cream cheese bowl. Using a rubber spatula, scoop from the bottom and fold over the top in a circular motion, rotating the bowl as you go. This gradual approach prevents deflating the mixture. Once the first addition is mostly incorporated with just a few streaks remaining, add another third and repeat. Finish with the final portion.
The goal is a uniform chocolate color throughout, but stop as soon as you achieve that. Overmixing will knock out air and leave you with a dense, heavy layer instead of the cloud-like texture that makes dirt cake irresistible.
Step 4: Create the ‘Dirt’ Topping
The magic of dirt cake lies in its crumbly “soil” topping, and Oreos are your secret weapon here. You’ve got two reliable methods to choose from.
For the food processor route, toss an entire 14.3-ounce package of Oreos, cream filling and all, into the bowl. Pulse 8-10 times until you get a mix of fine crumbs and pea-sized chunks. This varied texture mimics real garden soil perfectly and adds nice pops of cookie throughout.
No food processor? No problem. Drop the Oreos into a gallon-sized zip-lock bag, seal it tight, and grab a rolling pin or heavy can. Crush with firm, even pressure until you reach that same sandy-to-pebbly consistency. Takes about two minutes of rhythmic smashing.
Either way, avoid over-processing into powder. You want texture that looks authentically earthy, not like cocoa dust.
Step 5: Layer and Assemble
Now comes the fun part, building your dirt cake. Start by spreading about a third of your pudding-cream mixture into the bottom of your serving dish, creating an even layer with a spatula or the back of a spoon. Sprinkle a generous layer of crushed Oreos over the top, covering the pudding completely to create that signature “dirt” look.
Repeat this process with another third of the pudding mixture, smoothing it gently to avoid disturbing the Oreo layer beneath. Add another layer of crushed cookies, then finish with the remaining pudding mixture. For the final touch, cover the entire top surface with a thick layer of Oreo crumbs, don’t be shy here, as this creates the authentic dirt appearance.
If using a clear trifle dish, angle your layers slightly toward the glass edges so guests can see the distinct striping. Reserve a handful of cookie crumbs to refresh the top layer just before serving if it looks disturbed after chilling.
Step 6: Chill and Set
Cover your assembled dirt cake loosely with plastic wrap or aluminum foil, making sure the covering doesn’t touch the top layer of crushed Oreos. Place it in the refrigerator for at least 2 hours, though 4 hours is ideal for the layers to fully set and the flavors to meld together.
The dirt cake is ready when the pudding mixture holds its shape firmly and doesn’t jiggle when you gently shake the dish. The cream cheese layer should feel cold throughout, not just on the surface. For best results, prepare your dirt cake the night before serving. This overnight chilling allows the crushed cookies to soften slightly where they touch the creamy layers, creating a more cohesive texture while maintaining that signature crunch on top.
How to Know Your Dirt Cake Is Perfect
A perfectly executed dirt cake should have a mousse-like consistency in the pudding mixture, smooth and creamy but substantial enough to hold its shape when spooned. When you press gently with the back of a spoon, the layers should feel set rather than liquidy, yet still yield softly without being firm or rubbery. The cream cheese layer adds body, so if your mixture seems too loose after the initial chill, give it another 30 minutes in the refrigerator.
The Oreo topping should maintain its crunchy, crumbly texture that mimics actual dirt. If the cookies start absorbing moisture and turning pasty, you’ve either added them too early or your pudding mixture was too warm during assembly. Always let your pudding base chill completely before layering, and add the final Oreo topping just before serving if you want maximum crunch.
Taste-wise, you’re looking for balanced sweetness where the chocolate pudding flavor comes through clearly without being cloying. The cream cheese should add a subtle tang that cuts through the richness. If your cake tastes one-dimensional or overly sweet, you may have skimped on the cream cheese or used a pudding mix that’s too sugary for your preferences.
Common fixes: If your layers are runny, the pudding didn’t set long enough or you folded in the Cool Whip while ingredients were still warm. If it’s too dense, you may have overmixed the cream cheese layer, deflating the air you worked in. A grainy texture usually means the cream cheese wasn’t fully softened before beating.
Healthier Modifications for Wellness-Focused Eating
You can transform this indulgent dessert into a more balanced treat without sacrificing the rich chocolate flavor that makes dirt cake irresistible.
Start with sugar-free instant chocolate pudding mix, which cuts significant calories while maintaining the creamy texture. Swap half the Cool Whip for plain Greek yogurt, this adds protein and creates a tangier, more complex flavor profile that balances the sweetness. The 2:1 ratio of Greek yogurt to whipped topping works beautifully and aligns with Canada’s food guide emphasis on protein-rich foods.
For the cream cheese layer, use reduced-fat (Neufchâtel) cream cheese instead of full-fat. You won’t notice a difference in texture, but you’ll save about 30 calories per serving. Replace butter with an additional tablespoon of Greek yogurt mixed with a teaspoon of vanilla extract for moisture and flavor depth.
The Oreo “dirt” layer offers surprising flexibility. Mix crushed chocolate graham crackers with a small portion of Oreos to reduce added sugar while keeping that essential dark appearance. You can also try chocolate protein powder mixed with finely crushed almonds for a nutrient boost.
Portion control makes the biggest difference. Serve dirt cake in small mason jars or 4-ounce ramekins rather than a large trifle dish. Individual servings naturally limit intake and look elegant at gatherings. These smaller portions let you enjoy the dessert mindfully, satisfying your sweet tooth without overindulgence.
Consider adding a layer of fresh berries between the pudding and cream cheese mixture. Strawberries or raspberries contribute fiber, vitamins, and natural sweetness while creating visual interest. This modification transforms dirt cake from pure indulgence into a dessert with legitimate nutritional value.
Serving Ideas and Presentation Tips
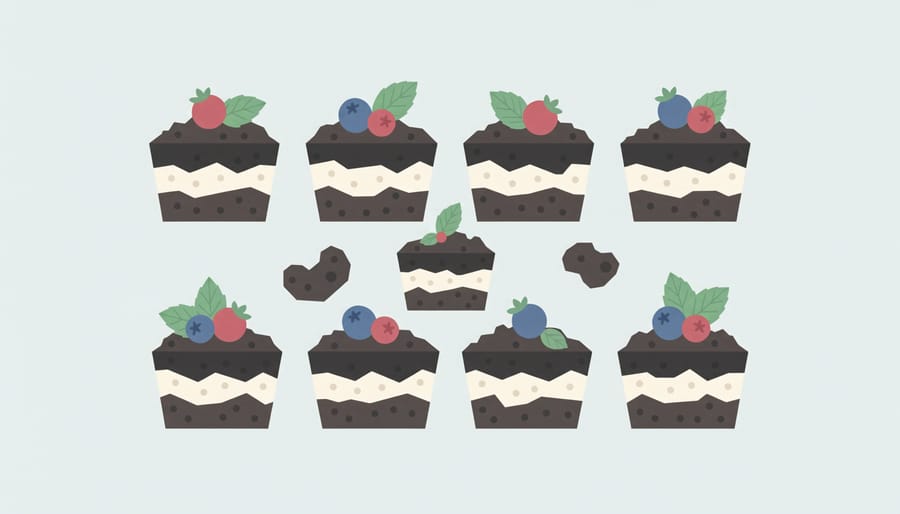
Transform your dirt cake into a showstopper with thoughtful presentation. For individual servings, layer the pudding mixture and crushed Oreos in clear plastic cups or small mason jars, guests love seeing the distinct layers, and these portions travel well to potlucks without the mess of scooping from a large dish.
Themed presentations add personality: stick silk flowers into a clean terracotta pot for garden parties, or top individual servings with gummy worms crawling out of the “dirt” for kids’ birthdays. Fresh mint sprigs or edible flowers like pansies create an elegant contrast against the chocolate for adult gatherings.
Budget-conscious hosts can stretch servings by using a 9×13 pan and cutting precise squares rather than free-form scoops. Pair small portions with fresh strawberries or melon to round out dessert for a quick dessert night without inflating costs. Clear trifle dishes showcase the layers beautifully while allowing one cake to serve 12-15 people when portioned mindfully. The no-bake nature means you can prep the day before, freeing you to focus on other dishes.
Common Questions About Dirt Cake
Common questions pop up when making this dessert for the first time, and having the answers handy makes the process smoother and more enjoyable.
How long can I store dirt cake in the refrigerator?
Dirt cake stays fresh in the refrigerator for 3-4 days when covered tightly with plastic wrap or stored in an airtight container. The Oreo topping may soften slightly over time, but the dessert remains perfectly edible and delicious.
Can I make dirt cake ahead of time?
Yes, dirt cake is ideal for advance preparation and actually benefits from sitting overnight as the flavors meld together. Make it 24 hours before serving for best results, adding the crushed Oreo topping just before presenting if you prefer maximum crunch.
What can I substitute for Cool Whip?
Homemade whipped cream works beautifully as a substitute, though it creates a slightly less stable mixture. For each cup of Cool Whip, use one cup of heavy cream whipped with two tablespoons of powdered sugar until stiff peaks form.
Can I use different cookie flavors instead of Oreos?
Absolutely! Try chocolate graham crackers, chocolate wafer cookies, or even brownies crumbled for the dirt layer. Vanilla sandwich cookies work if you want lighter-colored “sand” instead of dark dirt, perfect for beach-themed presentations.
Another common concern involves customization for dietary needs. Sugar-free pudding mix works seamlessly in this recipe without changing the texture, while gluten-free chocolate sandwich cookies provide an excellent Oreo substitute for those avoiding gluten. For a lighter version, swap half the cream cheese for Greek yogurt, which adds protein while reducing calories and maintaining that tangy richness.
Serving size questions arise frequently, especially for parties. A standard 9×13 pan serves 12-15 people generously, while individual flower pot presentations work perfectly for portion control and create built-in serving sizes of about half a cup per guest.
Now you have everything you need to create a dirt cake with chocolate pudding that’s both delicious and surprisingly simple. This no-bake dessert proves you don’t need hours in the kitchen to make something impressive. Whether you stick with the classic recipe or try the healthier modifications we’ve covered, you’re creating a treat that brings joy without unnecessary stress.
The beauty of dirt cake lies in its flexibility. Start with the basic version, then experiment with the lighter swaps that fit your wellness goals. Use Greek yogurt instead of cream cheese one time. Try sugar-free pudding the next. Even small changes add up when you’re balancing indulgence with mindful eating.
Remember, a wellness-focused lifestyle doesn’t mean giving up desserts you love. It means finding smarter ways to enjoy them. This dirt cake delivers that balance perfectly, letting you serve something fun and satisfying while staying aligned with your health priorities.