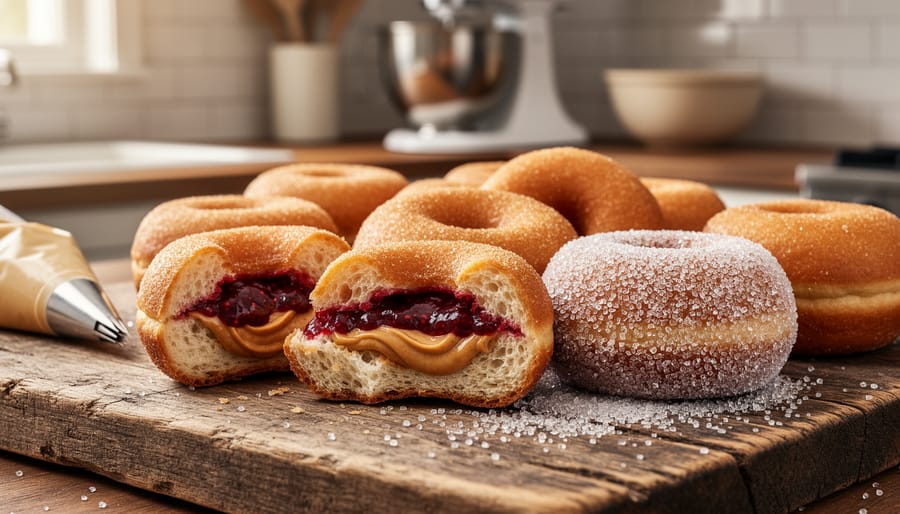
Making jelly donuts at home takes about two hours from start to finish and requires basic baking skills, yielding roughly a dozen pillowy, sugar-coated treats filled with your favorite jam. You’ll fry yeasted dough rounds until golden, let them cool just enough to handle, then use a piping bag to inject sweet filling into each center before rolling them in granulated sugar. The process is surprisingly forgiving, and once you master the basic technique, you can experiment with everything from classic raspberry preserves to inventive peanut butter and jelly combinations that bring nostalgic comfort to your kitchen.
For health-conscious bakers in 2026, homemade jelly donuts offer complete control over ingredients. You decide the sugar content, choose organic flour, and select preserves without artificial additives or excess corn syrup. Some bakers even incorporate CBD-infused oils into the dough for a wellness-forward twist, though this requires careful attention to temperature since cannabinoids break down above 350°F. The economic advantage is clear too: a batch costs roughly $5 to $8 in ingredients compared to $2 to $4 per donut at specialty shops.
This recipe transforms easy dessert night into something memorable. The dough comes together in a stand mixer, rises while you prep your filling station, and fries in minutes per batch. You’ll know they’re ready when the exterior turns deep amber and the interior reaches a fluffy, tender crumb that pulls apart in soft layers around pockets of jewel-toned jelly.
Why This Jelly Donut Recipe Works for Health-Conscious Bakers
Making jelly donuts from scratch gives you complete control over what goes into your body. Commercial donuts often contain hydrogenated oils, high-fructose corn syrup, artificial colors, and preservatives you can’t pronounce. When you make them at home, you choose the oil (coconut, avocado, or high-quality canola), swap refined sugar for coconut sugar or honey, and fill your donuts with organic fruit preserves that contain actual fruit instead of corn syrup and artificial flavoring.
This transparency matters for anyone managing dietary restrictions, tracking macros, or simply wanting to know exactly what they’re eating. A single store-bought jelly donut can pack 300-400 calories with 15-20 grams of sugar, but your homemade version allows portion control through smaller cuts and reduced sweetener amounts. The peanut butter in this recipe adds protein and healthy fats, making these donuts more satisfying than their hollow, sugar-loaded counterparts.
From an economic perspective, one batch of homemade donuts costs roughly the same as buying three or four from a bakery, yet yields a dozen or more. You’re not paying markup for convenience or branding. For Canadian bakers exploring wellness options, you can incorporate CBD oil into the glaze or filling, following Health Canada cannabis regulations for edibles. Start with a low dose per serving and label clearly if sharing with others.
Essential Tools and Ingredients for Peanut Butter and Jelly Doughnuts
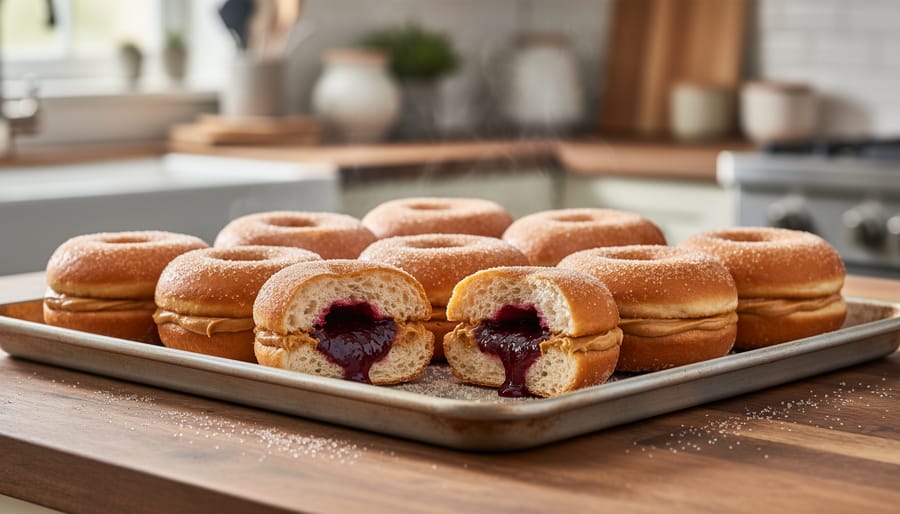
Before you start making these nostalgic Peanut Butter and Jelly Doughnuts, gather your equipment and ingredients. Having everything ready prevents mid-recipe scrambles and helps you work confidently through each step.
Tools You’ll Need:
- Large mixing bowl and smaller bowls for separating wet and dry ingredients
- Stand mixer with dough hook attachment or hand mixer (you can also knead by hand)
- 3-inch round cookie cutter or dough cutter for shaping
- Deep-fry or candy thermometer that reads up to 400°F
- Heavy-bottomed pot (at least 4 quarts) or electric deep fryer
- Piping bag fitted with a medium round tip for filling
- Wire cooling rack set over a baking sheet
- Spider strainer or slotted spoon for lifting doughnuts from oil
- Rolling pin and clean kitchen towels
Ingredients for the Recipe:
- 3½ cups all-purpose flour or whole wheat pastry flour for a fiber boost
- 2¼ teaspoons active dry yeast (one standard packet)
- ¾ cup warm milk, dairy, oat, almond, or soy all work
- 2 large eggs or ¼ cup aquafaba as an egg substitute
- ⅓ cup natural peanut butter (the kind with just peanuts and salt)
- 1 cup quality fruit preserves or jam, raspberry, strawberry, or grape are classic choices
- Neutral oil for frying: canola, vegetable, or refined coconut oil (about 6-8 cups)
- ¼ cup organic cane sugar or coconut sugar for coating
- Optional: CBD oil (food-grade, legal in Canada) for wellness integration, start with 5-10mg per batch
Choose organic ingredients where budget allows, especially for the peanut butter and preserves, since these flavors shine through. Quality fruit spreads with minimal added sugar keep the recipe closer to whole-food nutrition while delivering that nostalgic PB&J taste.
Safety and Preparation Tips Before You Begin
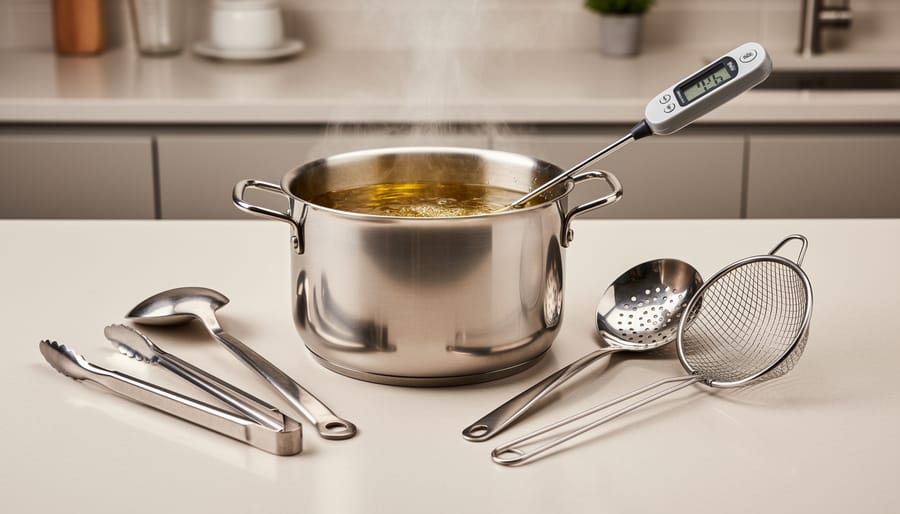
Working with hot oil demands your full attention and proper precautions. Before you start making jelly donuts, set up a safe frying station away from water sources, flammable materials, and high-traffic areas where someone might bump into you. Keep a fire extinguisher rated for grease fires within arm’s reach, and make sure children and pets stay out of the kitchen entirely during the frying process. Use a deep-fry or candy thermometer clipped to the side of your pot, guessing oil temperature leads to greasy or burnt donuts and increases fire risk.
Never leave hot oil unattended, even for a moment. Water and hot oil create violent splattering, so dry your doughnuts thoroughly after the second rise and keep wet ingredients far from the fryer. Before you mix anything, bring your eggs, milk, and peanut butter to room temperature, this helps the dough rise evenly and prevents temperature shock when ingredients combine. Clear your workspace completely, lay out paper towel-lined cooling racks near the stove, and have your piping bag and jelly ready so you’re not scrambling mid-process. Common mistakes beginners make include overcrowding the pot (which drops oil temperature dramatically), skipping the thermometer (leading to raw centers or greasy exteriors), and attempting to flip donuts too early before a crust forms. Prepare everything in advance, stay focused, and you’ll handle the frying process confidently.
Step-by-Step Instructions for Making Jelly Donuts
Preparing the Dough
Start by warming ½ cup milk to about 110°F, it should feel pleasantly warm on your wrist, not hot. Stir in 2¼ teaspoons active dry yeast and 1 tablespoon sugar, then let it sit for 5-10 minutes until foamy and slightly puffed. If nothing happens, your yeast is dead; start over with fresh yeast.
While the yeast activates, whisk together 3 cups all-purpose flour, ¼ cup sugar, and ½ teaspoon salt in a large bowl. In a separate bowl, beat 2 eggs with ¼ cup natural peanut butter and 3 tablespoons melted butter until smooth. The peanut butter adds subtle flavor and helps create a tender crumb.
Pour the foamy yeast mixture and peanut butter mixture into the flour. Stir until a shaggy dough forms, then turn it onto a lightly floured surface. Knead for 8-10 minutes, pushing the dough away with the heel of your hand, folding it back, and rotating. You’re looking for a smooth, elastic texture that springs back when poked and no longer sticks to your fingers. Add flour sparingly if needed, the dough should remain slightly tacky but workable.
Place the kneaded dough in a greased bowl, cover with a damp towel, and set in a warm spot. Let it rise for 1-1.5 hours until doubled in size. Press two fingers into the dough; if the indentations remain, it’s ready.
Shaping and Second Rise
Turn your risen dough onto a lightly floured surface and roll it to an even ½-inch thickness, slightly thicker than you think you need, because the dough will flatten a bit during frying. Use a round cutter (3 to 3½ inches works well for classic jelly donuts) to cut circles, pressing straight down without twisting to keep the edges clean. Gather the scraps, gently re-roll once, and cut additional rounds.
Transfer the cut donuts to parchment-lined baking sheets, spacing them about 2 inches apart. Cover loosely with a clean kitchen towel and let them rise in a warm, draft-free spot for 30 to 45 minutes. They’re ready when they look noticeably puffed and feel light to the touch. To test, gently press a fingertip into the edge, if the indentation slowly springs back but leaves a slight mark, they’re perfectly proofed. If the dough springs back immediately, give them more time; if it doesn’t spring back at all, they’ve over-proofed and may deflate during frying.
Frying the Doughnuts
Heat your oil to 350°F in a heavy-bottomed pot or deep fryer, using a deep-fry thermometer to verify the temperature. The oil should be at least 2-3 inches deep to allow the doughnuts to float freely. Test the temperature by dropping a small piece of dough into the oil, it should sizzle immediately and turn golden in about 60 seconds.
Working in batches of 2-3 doughnuts at a time, gently slide each one into the hot oil using a slotted spoon or spider strainer. Avoid crowding the pot, which drops the oil temperature and results in greasy, oil-soaked doughnuts. Fry for 2-3 minutes on the first side until deep golden brown, then carefully flip using your slotted spoon and fry another 2-3 minutes on the second side.
Monitor your thermometer constantly. If the temperature drops below 340°F, wait before adding more doughnuts and let the oil recover. If it climbs above 365°F, reduce the heat immediately to prevent burning the exterior while leaving the center raw.
You’ll know the doughnuts are properly cooked when they’re uniformly golden brown on both sides and feel light when lifted, they should not feel heavy or dense. The interior should reach 190-200°F. Remove each doughnut with your slotted spoon and transfer to a wire rack set over paper towels to drain excess oil.
Filling with Jelly and Finishing
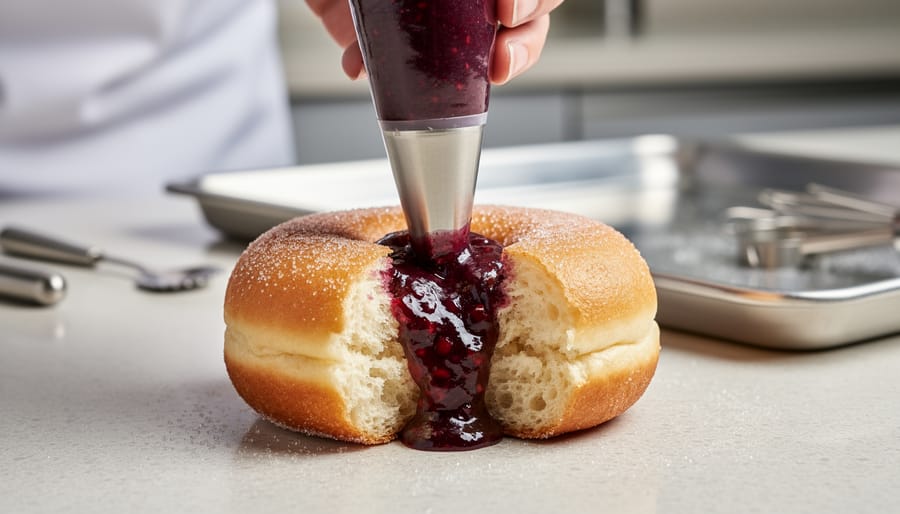
Let the fried doughnuts rest on paper towels for 5-7 minutes until cool enough to handle but still warm. While they cool, spoon your chosen jam or jelly into a piping bag fitted with a long, narrow tip (a Bismarck tip works perfectly). If you don’t have a piping bag, a heavy-duty plastic bag with one corner snipped works in a pinch.
Use a sharp paring knife or chopstick to create a small entry hole in the side of each doughnut, inserting it about halfway through. Hold the doughnut in one hand and insert the piping tip into the hole. Gently squeeze the bag, applying steady pressure until you feel slight resistance, this tells you the center is full. You should see the doughnut expand just a bit. Aim for about 2-3 teaspoons of filling per doughnut.
Once filled, dust the warm doughnuts with natural cane sugar, coconut sugar, or powdered sweetener. For the full Peanut Butter and Jelly experience, warm 2-3 tablespoons of natural peanut butter with a teaspoon of milk until pourable, then drizzle over the tops. This adds nostalgic flavor and extra protein. Serve immediately for the best texture.
How to Know Your Jelly Donuts Are Perfect
Perfectly fried jelly donuts reveal their success through several key indicators. Insert an instant-read thermometer into the center, the internal temperature should register between 190°F and 200°F. The exterior should display an even golden-brown color on both sides, not pale or burnt. When you gently press the side, it should spring back slowly, indicating a soft, pillowy interior rather than dense or doughy resistance.
Bite into one to assess jelly distribution. The filling should spread throughout most of the interior without leaking excessively from the entry point. If you encounter a pocket of air with minimal filling, you stopped piping too early next time.
Greasy donuts that leave oil residue on your fingers signal oil temperature below 350°F during frying. The dough absorbed excess oil instead of forming a quick seal. Raw, doughy centers despite golden exteriors mean your oil ran too hot, cooking the outside before heat penetrated the middle. Deflated, flat donuts that lost their puff indicate over-proofing during the second rise, the dough exhausted its rising power before hitting the oil.
Store cooled donuts in an airtight container at room temperature. They taste best within 24 hours when the exterior maintains slight crispness and the interior stays soft. They’ll remain edible for 2-3 days, though texture degrades, the exterior softens and the filling may seep slightly.
Try variations next: chocolate filling, lemon curd, or a cinnamon-sugar coating instead of powdered sweetener. Experiment with whole grain flour ratios or different nut butters in the dough.
Nutritional Considerations and Wellness Integration
Homemade Peanut Butter and Jelly Doughnuts deliver around 250-300 calories each, with natural peanut butter contributing 4-5 grams of protein and healthy fats that slow sugar absorption. The jelly filling adds quick energy from carbohydrates, making these donuts a more balanced indulgence than typical bakery versions when you control the ingredients.
Swap all-purpose flour for whole wheat to boost fiber by 3-4 grams per serving. Choose fruit preserves with no added sugar, reducing total sugar content by 30-40 percent compared to commercial fillings. If you prefer ingredient shortcuts that still support wellness goals, look for organic options. Baking at 375°F for 12-15 minutes instead of frying cuts fat content in half while keeping the treat meal prep friendly for several days.
For Canadian readers exploring CBD integration in 2026, add 5-10 mg of food-grade CBD oil to your dough or peanut butter filling. Start with lower doses and ensure your source is licensed under current Health Canada regulations. Enjoy one donut as an occasional treat within your daily calorie budget rather than making it a daily habit.
Frequently Asked Questions
Can I bake jelly donuts instead of frying them?
Yes, you can bake these at 375°F for 12-15 minutes until golden. They’ll have a different texture, more like sweet rolls than traditional donuts, but they’re still delicious and significantly lower in fat.
How do I prevent my donuts from absorbing too much oil?
Keep your oil at a steady 350-365°F throughout frying. If the temperature drops below 340°F, the donuts absorb oil instead of crisping quickly. Use a thermometer and fry in small batches.
Can I make the dough ahead of time?
Absolutely. After the first rise, punch down the dough, cover tightly, and refrigerate for up to 24 hours. Let it come to room temperature for 30 minutes before shaping and continuing with the recipe.
What’s the best jelly or jam to use for filling?
Choose a thick, seedless jam or jelly that won’t make the donuts soggy. Raspberry, strawberry, and grape work beautifully. For the peanut butter and jelly variation, opt for your favorite childhood combination or try apricot preserves for something different.
How should I store leftover jelly donuts?
Store unfilled donuts in an airtight container at room temperature for up to two days. If already filled, refrigerate them and consume within 24 hours for best quality, as the jelly can make them soggy over time.
Can I freeze these donuts?
Freeze unfilled donuts in a single layer, then transfer to freezer bags for up to two months. Thaw at room temperature and fill fresh before serving for the best texture and flavor.
What if I don’t have a piping bag?
Use a zip-top plastic bag with one corner snipped off, or carefully spoon jelly into a small hole poked with a chopstick. A squeeze bottle also works well for thinner jellies.
Beyond these common questions, many home bakers wonder about adapting this recipe for dietary needs. You can substitute almond or cashew butter for peanut butter if you have allergies, and plant-based milk works just as well as dairy. Whole wheat pastry flour creates a slightly denser but more nutritious donut, while gluten-free all-purpose blends require extra binding (add one teaspoon of xanthan gum if your blend doesn’t include it). For those watching sugar intake, naturally sweetened fruit spreads with no added sugar reduce the overall sweetness without compromising flavor. The beauty of homemade donuts is complete control over every ingredient, allowing you to customize them to fit your wellness goals and dietary preferences.
Making jelly donuts at home gives you complete control over ingredients, portion sizes, and flavor combinations while saving money compared to bakery prices. This Peanut Butter and Jelly Doughnuts recipe proves that classic treats can align with wellness goals when you choose quality ingredients and practice mindful preparation. Try different fruit preserves, experiment with whole grain flours, or add a touch of CBD oil if you’re exploring wellness-focused baking. These homemade donuts fit beautifully into balanced meal planning as an occasional indulgence you can feel good about. Ready for more quick dessert ideas that put you in charge of what goes into your food? Browse our recipe collection for more creative, health-conscious options.